前言
随着docker的爆火,万物皆可容器化,当然Minecraft游戏服务端也不例外,早在docker刚出现的时候,itzg大佬在github的便推出了Minecraft running on docker的项目,支持各类服务端的运行。
但是随着笔者接触到云原生之后,便热衷于用k8s去部署各种支持容器化的项目,幸运的是itzg大佬也写了可以使用k8s的helm部署的chart包,这样我们就可以一键梭哈部署我们的Minecraft服务器啦!
准备工作
环境需求
- 8G以上的内存,100G以上硬盘
- 正常运行的Kubernetes 集群,版本1.4以上
- 提前预定义好存储卷PV provisioner 或者使用动态存储卷
- Helm版本v3.x以上
可选环境
- 部署Nginx ingress (Kubernetes ingress流量解决方案)
- 使用OpenEBS动态制备本地存储卷 (Kubernetes存储解决方案)
- 使用Cert-manager实现服务端域名https自动证书申请
准备部署
当以上环境条件满足后,我们就可以开始愉快部署了:
在终端输入以下命令后,于是我们的部署就完成啦 ,happy helming :)
helm install minecraft \
  --set minecraftServer.eula=true itzg/minecraft
很显然我们不可能稀里糊涂的就这么部署了,我们既没有指定使用哪种服务端,也没有指定对应java版本等等,这不是我们所期望的结果。
所以在开始前,我们先得获取作者提供的Helm chart包,在ArtifactHub这个网站就可以获取到我们所需的Minecraft chart包。
然后我们将下载好的包解压之后,会得到如下文件:
minecraft
├── Chart.yaml
├── README.md
├── ci
│   └── test-values.yaml
├── templates
│   ├── NOTES.txt
│   ├── _helpers.tpl
│   ├── backupdir-pvc.yaml
│   ├── datadir-pvc.yaml
│   ├── deployment.yaml
│   ├── extra-list.yaml
│   ├── extraports-ing.yaml
│   ├── extraports-svc.yaml
│   ├── minecraft-svc.yaml
│   ├── rclone-secret.yaml
│   ├── rcon-svc.yaml
│   └── secrets.yaml
├── values.schema.json
└── values.yaml首先我们新建一份yaml格式的空白文件,命名为customized-values.yaml,后面我们会用这份文件自定义配置,达到我们期望部署的Minecraft服务端。
然后我们打开values.yaml,我们会看到许多配置参数,令人眼花缭乱,但是我们只看对我们部署关键的参数,然后把这些参数按照yaml语法格式复制到我们新建的values文件里,可以参考如下我在新的values文件里定义的参数。
images tag
这里可以参考作者给的文档详细展示了容器镜像tag和java版本的对应关系,这样可以找到适合运行Minecraft服务端的java版本。
#指定容器的镜像地址,以及镜像tag使用哪个版本的java
# ref: https://hub.docker.com/r/itzg/minecraft-server/
image:
  repository: itzg/minecraft-server
  tag: java11-jdk
  pullPolicy: IfNotPresent
  pullSecret: ""
CPU/Memory资源限制
个人建议可以把resource设置上,以免容器内存或者CPU过高把节点搞崩。
resources:
  requests:
    memory: 4096Mi
    cpu: 1000m
  limits:
    cpu: 5500m
    memory: 8192Mi
工作节点选择(可跳过不设置)
如果你是多个工作节点的话,可以忽略scheduler的调度算法,指定pod到哪个节点上去部署
nodeSelector:
  kubernetes.io/hostname: home-local-worker07
探活设置
#这里我把initialDelaySeconds调成了300s,视个人网络情况而定,以便给服务端足够的启动时间,防止服务端没能在探活周期正常运行,导致被强制kill掉。
livenessProbe:
  command:
    - mc-health
  initialDelaySeconds: 300
  periodSeconds: 5
  failureThreshold: 20
  successThreshold: 1
  timeoutSeconds: 1
readinessProbe:
  command:
    - mc-health
  initialDelaySeconds: 300
  periodSeconds: 5
  failureThreshold: 20
  successThreshold: 1
  timeoutSeconds: 1
好了,接下来是重头戏了~
Minecraft服务端参数设置
这一长串参数就是我们指定使用哪种服务端和版本,以及预定义游戏参数的地方,咋一看挺多,没关系,特别需要注意的地方,我已经在下面加上了中文注释,其他部分,英文注释已经解释得很清楚了,接下来让我们一个一个地看吧。
minecraftServer:
  #首当其冲,我们必须先同意EULA协议,至于这个是什么协议,我相信只要开过mc服务器的同学应该都知道
  eula: "TRUE"

  #版本我就不细说了,个人选择需要的版本
  # One of: LATEST, SNAPSHOT, or a specific version (ie: "1.7.9").
  version: "1.16.5"

  #下面的注释是作者提供的可以使用的服务端类型,这里笔者选的是Forge服务端,但经过本人测试实际上支持像猫端这样的服务端。
  #具体细节可以参考这个网址: https://docker-minecraft-server.readthedocs.io/en/latest/types-and-platforms/
  # This can be one of "VANILLA", "FORGE", "SPIGOT", "BUKKIT", "PAPER", "FTBA", "SPONGEVANILLA", "CURSEFORGE"
  type: "FORGE"

  #forge的版本号,不必多说,如果你开mod服需要特定forge版本号的话,可以在这里指定
  # If type is set to FORGE, this sets the version; this is ignored if forgeInstallerUrl is set
  forgeVersion:
  # If type is set to SPONGEVANILLA, this sets the version
  spongeVersion:

  #下面4个url,可以自定义下载直链运行
  # If type is set to FORGE, this sets the URL to download the Forge installer
  forgeInstallerUrl:
  # If type is set to BUKKIT, this sets the URL to download the Bukkit package
  bukkitDownloadUrl:
  # If type is set to SPIGOT, this sets the URL to download the Spigot package
  spigotDownloadUrl:
  # If type is set to PAPER, this sets the URL to download the PaperSpigot package
  paperDownloadUrl:
  # If type is set to FTBA, this sets the modpack to run
  ftbModpackId:
  # If type is set to FTBA and a modpack is set, this sets the version to run
  ftbModpackVersionId:
  # If type is set to CURSEFORGE, this sets the server mod to run. Can also provide url to curseforge package.
  cfServerMod:
  # Set to true if running Feed The Beast and get an error like "unable to launch forgemodloader"
  ftbLegacyJavaFixer: default
  # One of: peaceful, easy, normal, and hard
  difficulty: easy
  # A comma-separated list of player names to whitelist.
  whitelist:

  #指定玩家名字为op
  # A comma-separated list of player names who should be admins.
  ops:

  #设置服务器图标的地方
  # A server icon URL for server listings. Auto-scaled and transcoded.
  icon: "https://your-icon.example.com/i/2023/10/07/652172629ec2e.png"
  # Max connected players.
  maxPlayers: 20
  # This sets the maximum possible size in blocks, expressed as a radius, that the world border can obtain.
  maxWorldSize: 20000
  # Allows players to travel to the Nether.
  allowNether: default
  # Allows server to announce when a player gets an achievement.
  announcePlayerAchievements: default
  # Enables command blocks.
  enableCommandBlock: default
  # If true, players will always join in the default gameMode even if they were previously set to something else.
  forcegameMode: default
  # Defines whether structures (such as villages) will be generated.
  generateStructures: default
  # If set to true, players will be set to spectator mode if they die.
  hardcore: default
  # The maximum height in which building is allowed.
  maxBuildHeight: 256
  # The maximum number of milliseconds a single tick may take before the server watchdog stops the server with the message. -1 disables this entirely.
  maxTickTime: 60000
  # Determines if animals will be able to spawn.
  spawnAnimals: default
  # Determines if monsters will be spawned.
  spawnMonsters: default
  # Determines if villagers will be spawned.
  spawnNPCs: default
  # Sets the area that non-ops can not edit (0 to disable)
  spawnProtection: 16
  # Max view distance (in chunks).
  viewDistance: 10
  # Define this if you want a specific map generation seed.
  levelSeed:
  # One of: creative, survival, adventure, spectator
  gameMode: survival
  # Message of the Day
  motd: "Welcome to §nMinecraft on §l§cKubernetes!§r"
  # If true, enable player-vs-player damage.
  pvp: default

  #如果你使用了地形mod,例如低版本的多生物群系需要更改  levelType的名字,就可以在这里设置
  # One of: DEFAULT, FLAT, LARGEBIOMES, AMPLIFIED, CUSTOMIZED
  levelType: DEFAULT
  # When levelType == FLAT or CUSTOMIZED, this can be used to further customize map generation.
  # ref: https://hub.docker.com/r/itzg/minecraft-server/
  generatorSettings:
  worldSaveName: world
  # If set, this URL will be downloaded at startup and used as a starting point
  downloadWorldUrl:
  # force re-download of server file
  forceReDownload: false
  # If set, the modpack at this URL will be downloaded at startup
  downloadModpackUrl:
  # If true, old versions of downloaded mods will be replaced with new ones from downloadModpackUrl
  removeOldMods: false
  # A list of VanillaTweaks Share Codes to download. (https://vanillatweaks.net/share#wUq1iz => "wUq1iz")
  vanillaTweaksShareCodes: []
  # Optional URI to a resource pack. The player may choose to use it.
  resourcePackUrl:
  # Optional SHA-1 digest of the resource pack, in lowercase hexadecimal.
  # It is recommended to specify this, because it is used to verify the integrity of the resource pack.
  resourcePackSha:
  # When true, players will be prompted for a response and will be disconnected if they decline the required pack
  resourcePackEnforce: false

  #在线验证模式,请支持正版
  # Check accounts against Minecraft account service.
  onlineMode: false
  # Require public key to be signed by Mojang to join
  enforceSecureProfile: default

  #这个地方请特别注意,内存一定要和之前在resource下的limit的memory的值要对应上,否则会出现OOM Killed的情况
  # If you adjust this, you may need to adjust resources.requests above to match.
  memory: 8192M

  #自定义jvm的启动参数的地方,如果服务端启动需要特别优化,可以在这里设置
  # General JVM options to be passed to the Minecraft server invocation
  jvmOpts: ""
  # Options like -X that need to proceed general JVM options
  jvmXXOpts: ""

  #默认情况下,服务器配置将根据以下环境变量创建和设置,但仅在服务器第一次启动时创建和设置,如果想在每次容器启动时重写服务器配置,可以将此设置为true
  # By default, the server configuration will be created and set based on the following environment variables, but only the first time the server is started
  # If you would like to override the server configuration each time the container starts up, you can set this to true
  # see https://github.com/itzg/docker-minecraft-server#server-configuration
  overrideServerProperties: false
  # DEPRECATED: use top-level rconServiceAnnotations instead
  serviceAnnotations: {}

  #这里涉及到kubernetes的service对外访问的设置,后文会详细解释这部分。
  serviceType: ClusterIP
  ## Set the port used if the serviceType is NodePort
  nodePort:
  # Set the external port of the service, usefull when using the LoadBalancer service type
  servicePort: 25565
  clusterIP:
  loadBalancerIP:
  # loadBalancerSourceRanges: []
  ## Set the externalTrafficPolicy in the Service to either Cluster or Local
  # externalTrafficPolicy: Cluster
  externalIPs:
RCON
这里我们需要开启RCON,以便可以进入服务端后台执行op命令,记得更改密码
  rcon:
    # If you enable this, make SURE to change your password below.
    enabled: true
    # By default, the container will generate a random password at startup
    # to ensure internal RCON tooling, including a backup container,
    port: 25575
    password: "CHANGEME!"
游戏数据持久化
由于我这边设置的动态制备存储卷,所以在 storageClass这里设置了提供动态制备存储卷的服务名字
如果你不是动态制备,手动创建好pvc和pv通过设置existingClaim参数认领存储卷。
persistence:
  labels: {}
  annotations: {}
  ## minecraft data Persistent Volume Storage Class
  ## If defined, storageClassName: <storageClass>
  ## If set to "-", storageClassName: "", which disables dynamic provisioning
  ## If undefined (the default) or set to null, no storageClassName spec is
  ##   set, choosing the default provisioner.  (gp2 on AWS, standard on
  ##   GKE, AWS & OpenStack)
  ##
  storageClass: "openebs-hostpath"
  dataDir:
    # Set this to false if you don't care to persist state between restarts.
    enabled: true
    Size: 50Gi
    # existingClaim: nil
    ## specify a subpath in the volume where the data is. Useful when sharing volumes with other apps.
    # subPath: /path/to/dataDir
Minecraft存档备份(可跳过不设置)
如果你的存储空间足够可观的话,可以开启作者提供的存档自动增量备份边车容器,详细参数可以看原始values文件的英文注释。
请特别注意开启自动备份的话,RCON控制台必须先启用。
# PLEASE NOTE! rcon must be enabled above!  It does NOT require a nodePort or loadBalancerIP
mcbackup:
  enabled: true

#默认resource参数设置,根据自身需求更改
  resources:
    requests:
      memory: 256Mi
      cpu: 100m
    limits:
      cpu: 200m
      memory: 256Mi

#备份数据持久化,如果不是动态制备,请手动创建好pvc和pv通过设置existingClaim参数认领存储卷。
  persistence:
    annotations: {}
    ## minecraft data Persistent Volume Storage Class
    ## If defined, storageClassName: <storageClass>
    ## If set to "-", storageClassName: "", which disables dynamic provisioning
    ## If undefined (the default) or set to null, no storageClassName spec is
    ##   set, choosing the default provisioner.  (gp2 on AWS, standard on
    ##   GKE, AWS & OpenStack)
    ##
    # storageClass: "-"
    storageClass: "openebs-hostpath"
    backupDir:
      # Set this to false if you don't care to persist state between restarts.
      enabled: true
      # existingClaim: nil
      Size: 20Gi
开始部署
将chart包传到对应的地方,然后执行如下命令:
helm install prod -f customized-values.yaml minecraft-4.15.0.tgz --namespace game --create-namespace --debug --timeout 600s然后等待一段时间,你会看到如下输出,说明部署已经完成
NAME: prod
LAST DEPLOYED: Sat Apr 20 23:48:00 2024
NAMESPACE: game
STATUS: deployed
REVISION: 1
TEST SUITE: None
NOTES:
Get the IP address of your Minecraft server by running these commands in the
same shell:
  export POD_NAME=$(kubectl get pods \
    --namespace game \
    -l "component=prod-minecraft" \
    -o jsonpath="{.items[0].metadata.name}")
  kubectl port-forward $POD_NAME 25565:25565
  echo "Point your Minecraft client at 127.0.0.1:25565"
接下来我们使用helm命令查看刚刚部署的release
root@tencent-beijing-master:~# helm list -n game
NAME    NAMESPACE       REVISION        UPDATED                                 STATUS          CHART                   APP VERSION
prod    game            1               2024-04-20 23:48:00.875150927 +0800 CST deployed        minecraft-4.15.0        SeeValues
我们再查看一下pod的运行情况吧
root@tencent-beijing-master:~# kubectl get pod -n game
NAME                                 READY   STATUS    RESTARTS         AGE
prod-minecraft-bf95f5499-c299p       2/2     Running  0   30m
再logs看一下pod的后台日志是否正常
kubectl logs -n game prod-minecraft-bf95f5499-c299p prod-minecraft看起来一切正常,请注意这里,如果你在前文开启了自动备份的话,pod里应该有2个容器,我们需要查看的是服务端的容器,另外一个容器是我们的备份容器。
root@tencent-beijing-master:~# kubectl logs -n game prod-minecraft-bf95f5499-c299p prod-minecraft
[init] Running as uid=1000 gid=3000 with /data as 'drwxrwsrwx 2 0 2000 4096 Apr 20 15:48 /data'
[init] Resolving type given FORGE
[mc-image-helper] 15:49:33.893 INFO  : Downloading Forge installer 36.2.34 for Minecraft 1.16.5
[mc-image-helper] 15:49:38.782 INFO  : Running Forge 36.2.34 installer for Minecraft 1.16.5. This might take a while...
[init] Creating server properties in /data/server.properties
[init] Disabling whitelist functionality
[init] Setting mode
[mc-image-helper] 15:51:36.567 INFO  : Created/updated 16 properties in /data/server.properties
[init] Using server icon from https://pic.lazytoki.cn/i/2023/10/07/652172629ec2e.png...
[init] Converting image to 64x64 PNG...
[init] Setting initial memory to 8192M and max to 8192M
[init] Starting the Minecraft server...
[Log4jPatcher] [INFO] Transforming org/apache/logging/log4j/core/lookup/JndiLookup
[Log4jPatcher] [INFO] Transforming org/apache/logging/log4j/core/pattern/MessagePatternConverter
[Log4jPatcher] [WARN]  Unable to find noLookups:Z field in org/apache/logging/log4j/core/pattern/MessagePatternConverter
[15:51:45] [main/INFO] [cp.mo.mo.Launcher/MODLAUNCHER]: ModLauncher running: args [--gameDir, ., --launchTarget, fmlserver, --fml.forgeVersion, 36.2.34, --fml.mcpVersion, 20210115.111550, --fml.mcVersion, 1.16.5, --fml.forgeGroup, net.minecraftforge]
[15:51:45] [main/INFO] [cp.mo.mo.Launcher/MODLAUNCHER]: ModLauncher 8.1.3+8.1.3+main-8.1.x.c94d18ec starting: java version 11.0.11 by AdoptOpenJDK
WARNING: An illegal reflective access operation has occurred
WARNING: Illegal reflective access by cpw.mods.modlauncher.SecureJarHandler (file:/data/libraries/cpw/mods/modlauncher/8.1.3/modlauncher-8.1.3.jar) to field java.util.jar.Manifest.jv
WARNING: Please consider reporting this to the maintainers of cpw.mods.modlauncher.SecureJarHandler
WARNING: Use --illegal-access=warn to enable warnings of further illegal reflective access operations
WARNING: All illegal access operations will be denied in a future release
[15:51:45] [main/INFO] [ne.mi.fm.lo.FixSSL/CORE]: Added Lets Encrypt root certificates as additional trust
[15:51:45] [main/INFO] [mixin/]: SpongePowered MIXIN Subsystem Version=0.8.4 Source=file:/data/libraries/org/spongepowered/mixin/0.8.4/mixin-0.8.4.jar Service=ModLauncher Env=SERVER
[15:51:45] [main/WARN] [ne.mi.fm.lo.FMLConfig/CORE]: Configuration file /data/config/fml.toml is not correct. Correcting
[15:51:45] [main/WARN] [ne.mi.fm.lo.FMLConfig/CORE]: Incorrect key [defaultConfigPath] was corrected from null to defaultconfigs
[15:51:46] [main/INFO] [STDERR/]: [jdk.nashorn.api.scripting.NashornScriptEngine:<init>:143]: Warning: Nashorn engine is planned to be removed from a future JDK release
[15:51:46] [main/INFO] [STDERR/]: [jdk.nashorn.api.scripting.NashornScriptEngine:<init>:143]: Warning: Nashorn engine is planned to be removed from a future JDK release
[15:51:46] [main/INFO] [STDERR/]: [jdk.nashorn.api.scripting.NashornScriptEngine:<init>:143]: Warning: Nashorn engine is planned to be removed from a future JDK release
[15:51:46] [main/INFO] [cp.mo.mo.LaunchServiceHandler/MODLAUNCHER]: Launching target 'fmlserver' with arguments [--gameDir, .]
[15:51:52] [modloading-worker-3/INFO] [ne.mi.co.ForgeMod/FORGEMOD]: Forge mod loading, version 36.2.34, for MC 1.16.5 with MCP 20210115.111550
[15:51:52] [modloading-worker-3/INFO] [ne.mi.co.MinecraftForge/FORGE]: MinecraftForge v36.2.34 Initialized
[15:51:53] [main/WARN] [ne.mi.co.ForgeConfigSpec/CORE]: Configuration file /data/config/forge-common.toml is not correct. Correcting
[15:51:53] [main/WARN] [ne.mi.co.ForgeConfigSpec/CORE]: Incorrect key general was corrected from null to its default, SimpleCommentedConfig:{}.
[15:51:53] [main/WARN] [ne.mi.co.ForgeConfigSpec/CORE]: Incorrect key general.defaultWorldType was corrected from null to its default, default.
[15:51:53] [Forge Version Check/INFO] [ne.mi.fm.VersionChecker/]: [forge] Starting version check at https://files.minecraftforge.net/net/minecraftforge/forge/promotions_slim.json
[15:51:55] [Forge Version Check/INFO] [ne.mi.fm.VersionChecker/]: [forge] Found status: UP_TO_DATE Current: 36.2.34 Target: null
[15:51:56] [main/INFO] [mojang/YggdrasilAuthenticationService]: Environment: authHost='https://authserver.mojang.com', accountsHost='https://api.mojang.com', sessionHost='https://sessionserver.mojang.com', servicesHost='https://api.minecraftservices.com', name='PROD'
[15:51:57] [main/WARN] [minecraft/Commands]: Ambiguity between arguments [teleport, destination] and [teleport, targets] with inputs: [Player, 0123, @e, dd12be42-52a9-4a91-a8a1-11c01849e498]
[15:51:57] [main/WARN] [minecraft/Commands]: Ambiguity between arguments [teleport, location] and [teleport, destination] with inputs: [0.1 -0.5 .9, 0 0 0]
[15:51:57] [main/WARN] [minecraft/Commands]: Ambiguity between arguments [teleport, location] and [teleport, targets] with inputs: [0.1 -0.5 .9, 0 0 0]
[15:51:57] [main/WARN] [minecraft/Commands]: Ambiguity between arguments [teleport, targets] and [teleport, destination] with inputs: [Player, 0123, dd12be42-52a9-4a91-a8a1-11c01849e498]
[15:51:57] [main/WARN] [minecraft/Commands]: Ambiguity between arguments [teleport, targets, location] and [teleport, targets, destination] with inputs: [0.1 -0.5 .9, 0 0 0]
[15:51:57] [main/INFO] [minecraft/SimpleReloadableResourceManager]: Reloading ResourceManager: Default, forge-1.16.5-36.2.34-universal.jar
[15:51:58] [Worker-Main-9/INFO] [minecraft/RecipeManager]: Loaded 7 recipes
[15:51:59] [Worker-Main-9/INFO] [minecraft/AdvancementList]: Loaded 927 advancements
[15:52:00] [Server thread/INFO] [minecraft/DedicatedServer]: Starting minecraft server version 1.16.5
[15:52:00] [Server thread/INFO] [minecraft/DedicatedServer]: Loading properties
[15:52:00] [Server thread/INFO] [minecraft/DedicatedServer]: Default game type: SURVIVAL
[15:52:00] [Server thread/INFO] [minecraft/MinecraftServer]: Generating keypair
[15:52:00] [Server thread/INFO] [minecraft/DedicatedServer]: Starting Minecraft server on *:25565
[15:52:00] [Server thread/INFO] [minecraft/NetworkSystem]: Using epoll channel type
[15:52:00] [Server thread/WARN] [minecraft/DedicatedServer]: **** SERVER IS RUNNING IN OFFLINE/INSECURE MODE!
[15:52:00] [Server thread/WARN] [minecraft/DedicatedServer]: The server will make no attempt to authenticate usernames. Beware.
[15:52:00] [Server thread/WARN] [minecraft/DedicatedServer]: While this makes the game possible to play without internet access, it also opens up the ability for hackers to connect with any username they choose.
[15:52:00] [Server thread/WARN] [minecraft/DedicatedServer]: To change this, set "online-mode" to "true" in the server.properties file.
[15:52:00] [Server thread/WARN] [ne.mi.co.ForgeConfigSpec/CORE]: Configuration file ./world/serverconfig/forge-server.toml is not correct. Correcting
[15:52:00] [Server thread/WARN] [ne.mi.co.ForgeConfigSpec/CORE]: Incorrect key server was corrected from null to its default, SimpleCommentedConfig:{}.
[15:52:00] [Server thread/WARN] [ne.mi.co.ForgeConfigSpec/CORE]: Incorrect key server.removeErroringEntities was corrected from null to its default, false.
[15:52:00] [Server thread/WARN] [ne.mi.co.ForgeConfigSpec/CORE]: Incorrect key server.removeErroringTileEntities was corrected from null to its default, false.
[15:52:00] [Server thread/WARN] [ne.mi.co.ForgeConfigSpec/CORE]: Incorrect key server.fullBoundingBoxLadders was corrected from null to its default, false.
[15:52:00] [Server thread/WARN] [ne.mi.co.ForgeConfigSpec/CORE]: Incorrect key server.zombieBaseSummonChance was corrected from null to its default, 0.1.
[15:52:00] [Server thread/WARN] [ne.mi.co.ForgeConfigSpec/CORE]: Incorrect key server.zombieBabyChance was corrected from null to its default, 0.05.
[15:52:00] [Server thread/WARN] [ne.mi.co.ForgeConfigSpec/CORE]: Incorrect key server.logCascadingWorldGeneration was corrected from null to its default, true.
[15:52:00] [Server thread/WARN] [ne.mi.co.ForgeConfigSpec/CORE]: Incorrect key server.fixVanillaCascading was corrected from null to its default, false.
[15:52:00] [Server thread/WARN] [ne.mi.co.ForgeConfigSpec/CORE]: Incorrect key server.dimensionUnloadQueueDelay was corrected from null to its default, 0.
[15:52:00] [Server thread/WARN] [ne.mi.co.ForgeConfigSpec/CORE]: Incorrect key server.treatEmptyTagsAsAir was corrected from null to its default, false.
[15:52:00] [Server thread/WARN] [ne.mi.co.ForgeConfigSpec/CORE]: Incorrect key server.fixAdvancementLoading was corrected from null to its default, true.
[15:52:00] [Server thread/INFO] [minecraft/DedicatedServer]: Preparing level "world"
[15:52:05] [Server thread/INFO] [minecraft/MinecraftServer]: Preparing start region for dimension minecraft:overworld
[15:52:05] [Worker-Main-9/INFO] [minecraft/LoggingChunkStatusListener]: Preparing spawn area: 0%
[15:52:05] [Worker-Main-9/INFO] [minecraft/LoggingChunkStatusListener]: Preparing spawn area: 0%
[15:52:06] [Worker-Main-6/INFO] [minecraft/LoggingChunkStatusListener]: Preparing spawn area: 3%
[15:52:06] [Worker-Main-8/INFO] [minecraft/LoggingChunkStatusListener]: Preparing spawn area: 6%
[15:52:07] [Worker-Main-9/INFO] [minecraft/LoggingChunkStatusListener]: Preparing spawn area: 11%
[15:52:07] [Worker-Main-8/INFO] [minecraft/LoggingChunkStatusListener]: Preparing spawn area: 16%
[15:52:08] [Worker-Main-7/INFO] [minecraft/LoggingChunkStatusListener]: Preparing spawn area: 21%
[15:52:08] [Worker-Main-7/INFO] [minecraft/LoggingChunkStatusListener]: Preparing spawn area: 32%
[15:52:09] [Worker-Main-7/INFO] [minecraft/LoggingChunkStatusListener]: Preparing spawn area: 32%
[15:52:09] [Worker-Main-6/INFO] [minecraft/LoggingChunkStatusListener]: Preparing spawn area: 42%
[15:52:10] [Worker-Main-9/INFO] [minecraft/LoggingChunkStatusListener]: Preparing spawn area: 42%
[15:52:10] [Worker-Main-8/INFO] [minecraft/LoggingChunkStatusListener]: Preparing spawn area: 60%
[15:52:11] [Worker-Main-9/INFO] [minecraft/LoggingChunkStatusListener]: Preparing spawn area: 68%
[15:52:12] [Worker-Main-9/INFO] [minecraft/LoggingChunkStatusListener]: Preparing spawn area: 78%
[15:52:12] [Worker-Main-10/INFO] [minecraft/LoggingChunkStatusListener]: Preparing spawn area: 78%
[15:52:12] [Server thread/INFO] [minecraft/LoggingChunkStatusListener]: Time elapsed: 7497 ms
[15:52:12] [Server thread/INFO] [minecraft/DedicatedServer]: Done (11.918s)! For help, type "help"
[15:52:12] [Server thread/INFO] [minecraft/DedicatedServer]: Starting remote control listener
[15:52:12] [Server thread/INFO] [minecraft/RConThread]: Thread RCON Listener started
[15:52:12] [Server thread/INFO] [minecraft/MainThread]: RCON running on 0.0.0.0:25575
设置管理员权限
最简单方法是通过kubectl exec的方式进入容器内部的rcon控制台设置管理员权限,由于笔者这里使用了存档备份的容器,所以在进入之前需要指定进入哪个容器。
有备份容器命令
kubectl exec -it -n game prod-minecraft-bf95f5499-c299p -c prod-minecraft rcon-cli无备份容器命令
kubectl exec -it -n game prod-minecraft-bf95f5499-c299p rcon-cli成功设置管理员权限
root@tencent-beijing-master:~# kubectl exec -it -n game prod-minecraft-bf95f5499-c299p -c prod-minecraft rcon-cli
kubectl exec [POD] [COMMAND] is DEPRECATED and will be removed in a future version. Use kubectl exec [POD] -- [COMMAND] instead.
> op Wllo_YU
Made Wllo_YU a server operator

> help
/advancement (grant|revoke)
/attribute <target> <attribute> (base|get|modifier)
/ban <targets> [<reason>]
/ban-ip <target> [<reason>]
/banlist [ips|players]
/bossbar (add|get|list|remove|set)
/clear [<targets>]
/clone <begin> <end> <destination> [filtered|masked|replace]
/config showfile <mod> <type>
/data (get|merge|modify|remove)
/datapack (disable|enable|list)
/debug (report|start|stop)
/defaultgamemode (adventure|creative|spectator|survival)
/deop <targets>
/difficulty [easy|hard|normal|peaceful]
/effect (clear|give)
/enchant <targets> <enchantment> [<level>]
/execute (align|anchored|as|at|facing|if|in|positioned|rotated|run|store|unless)
/experience (add|query|set)
/fill <from> <to> <block> [destroy|hollow|keep|outline|replace]
/forceload (add|query|remove)
/forge (dimensions|entity|generate|mods|setdimension|tps|track)
/function <name>
/gamemode (adventure|creative|spectator|survival)
/gamerule (announceAdvancements|commandBlockOutput|disableElytraMovementCheck|disableRaids|doDaylightCycle|doEntityDrops|doFireTick|doImmediateRespawn|doInsomnia|doLimitedCrafting|doMobLoot|doMobSpawning|doPatrolSpawning|doTileDrops|doTraderSpawning|doWeatherCycle|drowningDamage|fallDamage|fireDamage|forgiveDeadPlayers|keepInventory|logAdminCommands|maxCommandChainLength|maxEntityCramming|mobGriefing|naturalRegeneration|randomTickSpeed|reducedDebugInfo|sendCommandFeedback|showDeathMessages|spawnRadius|spectatorsGenerateChunks|universalAnger)
/give <targets> <item> [<count>]
/help [<command>]
/kick <targets> [<reason>]
/kill [<targets>]
/list [uuids]
/locate (bastion_remnant|buried_treasure|desert_pyramid|endcity|fortress|igloo|jungle_pyramid|mansion|mineshaft|monument|nether_fossil|ocean_ruin|pillager_outpost|ruined_portal|shipwreck|stronghold|swamp_hut|village)
/locatebiome <biome>
/loot (give|insert|replace|spawn)
/me <action>
/msg <targets> <message>
/op <targets>
/pardon <targets>
/pardon-ip <target>
/particle <name> [<pos>]
/playsound <sound> (ambient|block|hostile|master|music|neutral|player|record|voice|weather)
/recipe (give|take)
/reload
/replaceitem (block|entity)
/save-all [flush]
/save-off
/save-on
/say <message>
/schedule (clear|function)
/scoreboard (objectives|players)
/seed
/setblock <pos> <block> [destroy|keep|replace]
/setidletimeout <minutes>
/setworldspawn [<pos>]
/spawnpoint [<targets>]
/spectate [<target>]
/spreadplayers <center> <spreadDistance> <maxRange> (under|<respectTeams>)
/stop
/stopsound <targets> [*|ambient|block|hostile|master|music|neutral|player|record|voice|weather]
/summon <entity> [<pos>]
/tag <targets> (add|list|remove)
/team (add|empty|join|leave|list|modify|remove)
/teammsg <message>
/teleport (<destination>|<location>|<targets>)
/tell -> msg
/tellraw <targets> <message>
/time (add|query|set)
/title <targets> (actionbar|clear|reset|subtitle|times|title)
/tm -> teammsg
/tp -> teleport
/trigger <objective> [add|set]
/w -> msg
/weather (clear|rain|thunder)
/whitelist (add|list|off|on|reload|remove)
/worldborder (add|center|damage|get|set|warning)
/xp -> experience
>
设置服务端对外访问方式
既然我们的服务端部署完成了,那么如何暴露我们服务器的地址给小伙伴们愉快地玩耍喃?
我们现在get svc应该可以看到类型为ClusterIP的service,ClusterIP是用于集群内部通信的地址,很显然这是没法让外部客户端访问我们的服务端的。
root@tencent-beijing-master:~# kubectl get svc -n game
NAME                   TYPE        CLUSTER-IP    EXTERNAL-IP   PORT(S)     AGE
prod-minecraft         ClusterIP   10.96.3.43    <none>        25565/TCP   14d
prod-minecraft-rcon    ClusterIP   10.96.2.218   <none>        25575/TCP   14d
Kubernetes 提供了多种方式让pod内的服务可以被外部访问,这些方式包括:
NodePort:
- NodePort 是 Kubernetes 中最简单的一种对外暴露服务的方式之一。通过 NodePort,Kubernetes 会在每个节点上开放一个固定的端口,然后将该端口映射到 Service 中指定的端口上。外部用户可以通过访问节点的 IP 地址和这个端口来访问服务。NodePort 方式适合于测试和快速原型开发,但不适合在生产环境中大规模使用,因为它暴露了节点上的所有服务,可能会导致安全风险。
LoadBalancer:
- LoadBalancer 是一种更安全和灵活的对外暴露服务的方式。通过 LoadBalancer,Kubernetes 可以自动创建一个云服务提供商(如 AWS、GCP、Azure 等)所支持的负载均衡器,并将其配置为服务的前端。外部用户可以通过访问负载均衡器的 IP 地址或域名来访问服务。这种方式适合于生产环境中对高可用性和弹性要求较高的服务。
Ingress:
- Ingress 是一种在集群外部提供 HTTP 和 HTTPS 路由的方法。它通过将入站请求路由到集群内部的服务来实现对外暴露服务。Ingress 控制器可以根据请求的主机名或路径将请求路由到不同的服务。这种方式适合于需要在单个 IP 地址上托管多个服务的情况,同时提供灵活的路由配置和 TLS 终止功能。
ExternalName:
- ExternalName 是一种将服务映射到集群外部的服务的方式。它将一个 Kubernetes 服务映射到一个 DNS 名称,这个 DNS 名称指向集群外部的某个服务或者域名。这种方式适合于需要与集群外部的服务进行集成的情况,例如将集群内部的服务访问外部的数据库或者第三方服务。
这是笔者只提供1和3的访问方式,2和4需要有外部服务的支持,所以我们暂不使用。
NodePort NAT访问方式
两种方式设置NodePort
a.通过kubectl edit直接修改svc
kubectl edit svc -n game prod-minecraft我们需要把type这里改成NodePort的类型,然后wq保存退出。
type: NodePortb.通过helm更新设置为NodePort类型
还记得我们在Minecraft服务端参数设置时候,在serviceType这一行设置的值么,现在我们需要将其改成NodePort的类型。
serviceType: NodePort更新完这行配置后,执行helm upgrade命令
helm upgrade -n game --atomic --debug --timeout 600s prod -f customized-values.yaml minecraft-4.15.0.tgz查看service状态
这时我们可以看到在PORT这里已经有了我们容器内部端口25565映射为端口32048
root@tencent-beijing-master:~# kubectl get svc -n game
NAME                   TYPE        CLUSTER-IP    EXTERNAL-IP   PORT(S)           AGE
prod-minecraft         NodePort    10.96.3.43    <none>        25565:32048/TCP   14d
prod-minecraft-rcon    ClusterIP   10.96.2.218   <none>        25575/TCP         14d
访问服务端
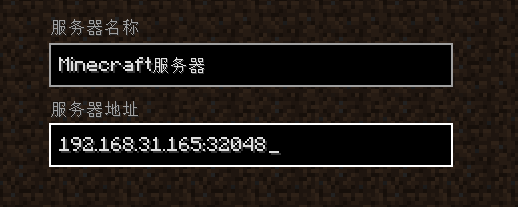
我们只需要将任意工作节点ip地址和映射出去的端口填入客户端,即可访问到我们的服务端。


Ingress TCP代理访问方式(需要部署Nginx ingress)
众所周知,Minecraft服务端是通过TCP进行连接的,所以我们可以通过ingress的四层代理方式为服务端提供访问。
由于Kubernetes 有多种ingress控制器,所以这里我们选择Nginx ingress。
虽然nginx ingress是专门针对七层的控制器,但是官方提供了文档 设置四层代理,需要我们在nginx ingress的控制器里加一行参数,让nginx ingress能够正确代理到我们的服务器端口。
创建configmap
我们需要在data这里设置我们需要代理端口的键值对,从左到右按照 需要代理出去的端口->命名空间->服务端service的名字->service端口号设置。
apiVersion: v1
kind: ConfigMap
metadata:
  name: tcp-proxy-service
  namespace: ingress-nginx
data:
  "25565": game/gateway-mc-router:25565
编辑ingress的controller的副本
kubectl edit ds -n ingress-nginx ingress-nginx-controller在args层级里添加如下配置
ingress-nginx(命名空间)/tcp-proxy-service(configmap名字)和上面创建的cm名字对应,添加完毕后wq保存退出。
   spec:
      containers:
      - args:
        - --tcp-services-configmap=ingress-nginx/tcp-proxy-service
nginx默认更新方式是RollingUpdate,等待pod一个一个重启完毕,并查看状态。
root@tencent-beijing-master:~/ingress# kubectl get pod -n ingress-nginx
NAME                                            READY   STATUS    RESTARTS   AGE
ingress-nginx-controller-5szfv                  1/1     Running   0          5m56s
ingress-nginx-controller-5t2jd                  1/1     Running   0          4m16s
ingress-nginx-controller-9fjqp                  1/1     Running   0          4m50s
ingress-nginx-controller-fkjrk                  1/1     Running   0          6m29s
ingress-nginx-controller-vhzs6                  1/1     Running   0          3m44s
ingress-nginx-controller-vw7s9                  1/1     Running   0          2m38s
ingress-nginx-controller-w9f7l                  1/1     Running   0          5m23s
ingress-nginx-controller-xqmlg                  1/1     Running   0          3m11s
ingress-nginx-defaultbackend-78d476db97-wr99h   1/1     Running   0          51m
我们get任意ingress controller pod,查看其配置,可以看到我们添加的args参数和pod在主机节点开启了25565这个端口。
因为笔者的ingress环境是采用了daemonset的方式部署的controller pod和使用了host network也就是和主机共享网络栈的模式暴露对外的端口,所以理论上可以通过多个节点负载均衡流量以及不通过controller service的NodePort的方式访问服务端
kubectl get pod -n ingress-nginx ingress-nginx-controller-vhzs6 -o yaml特别注意:如果加完参数,查看任意pod配置发现端口并没有开放,请按照yaml格式手动添加port的配置,并等待pod重启完毕。
至于为什么不生效,我也没有想明白,欢迎大佬解答。
  - args:
    - --tcp-services-configmap=ingress-nginx/tcp-proxy-service
    .  .  .  .  .
    ports:
    - containerPort: 25565
      hostPort: 25565
      name: 25565-tcp
      protocol: TCP
访问服务端
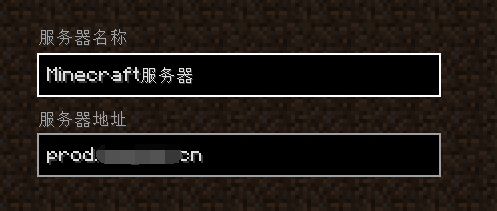
但在我们访问服务端之前,我们需要做一件事,那就是设置域名解析到我们的工作节点的公网地址上,这样我们就可以通过域名访问我们的服务端啦。
ps:如果你的节点都处于公网的环境下且采用daemonset的方式部署,理论上你可以将域名解析到多个工作节点上,实现4层流量负载均衡,但这取决于你的dns服务提供商,最多允许你添加几个相同域名的负载均衡设置。
接下来,大功告成!


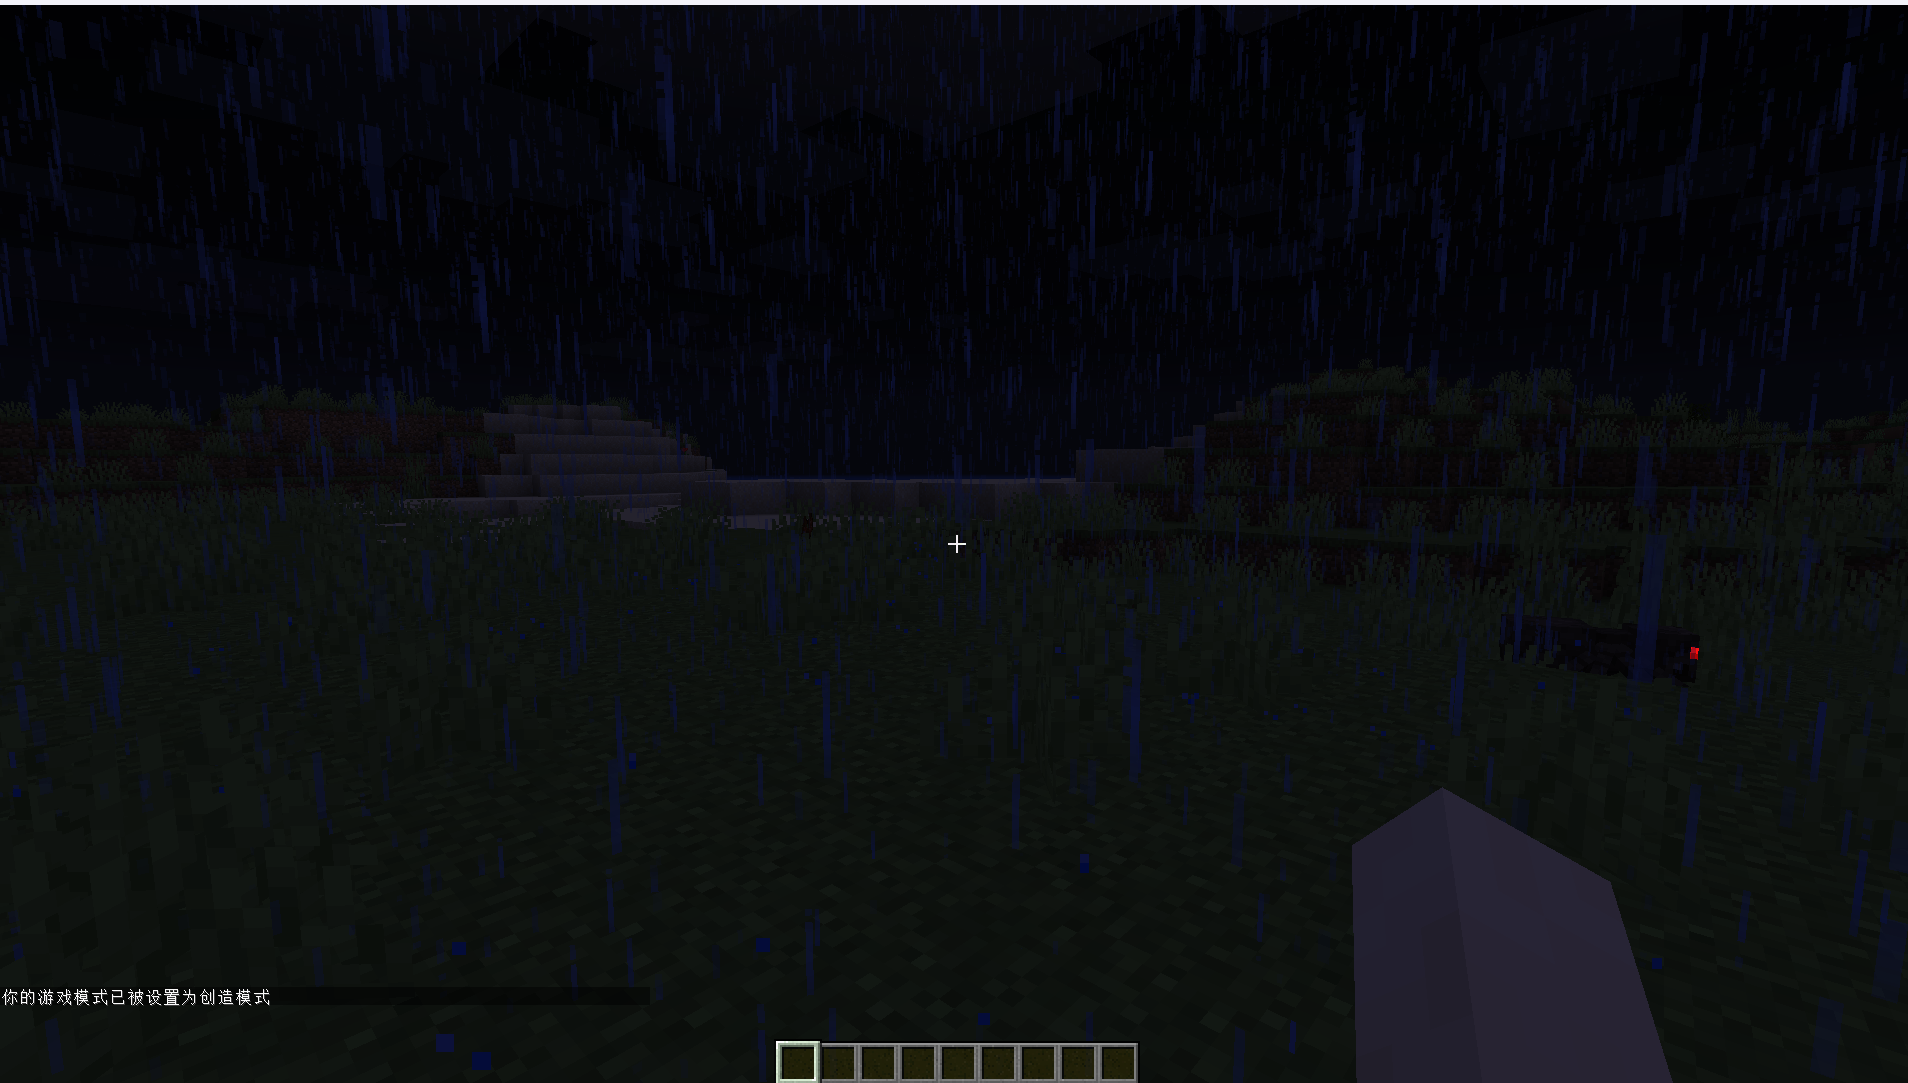
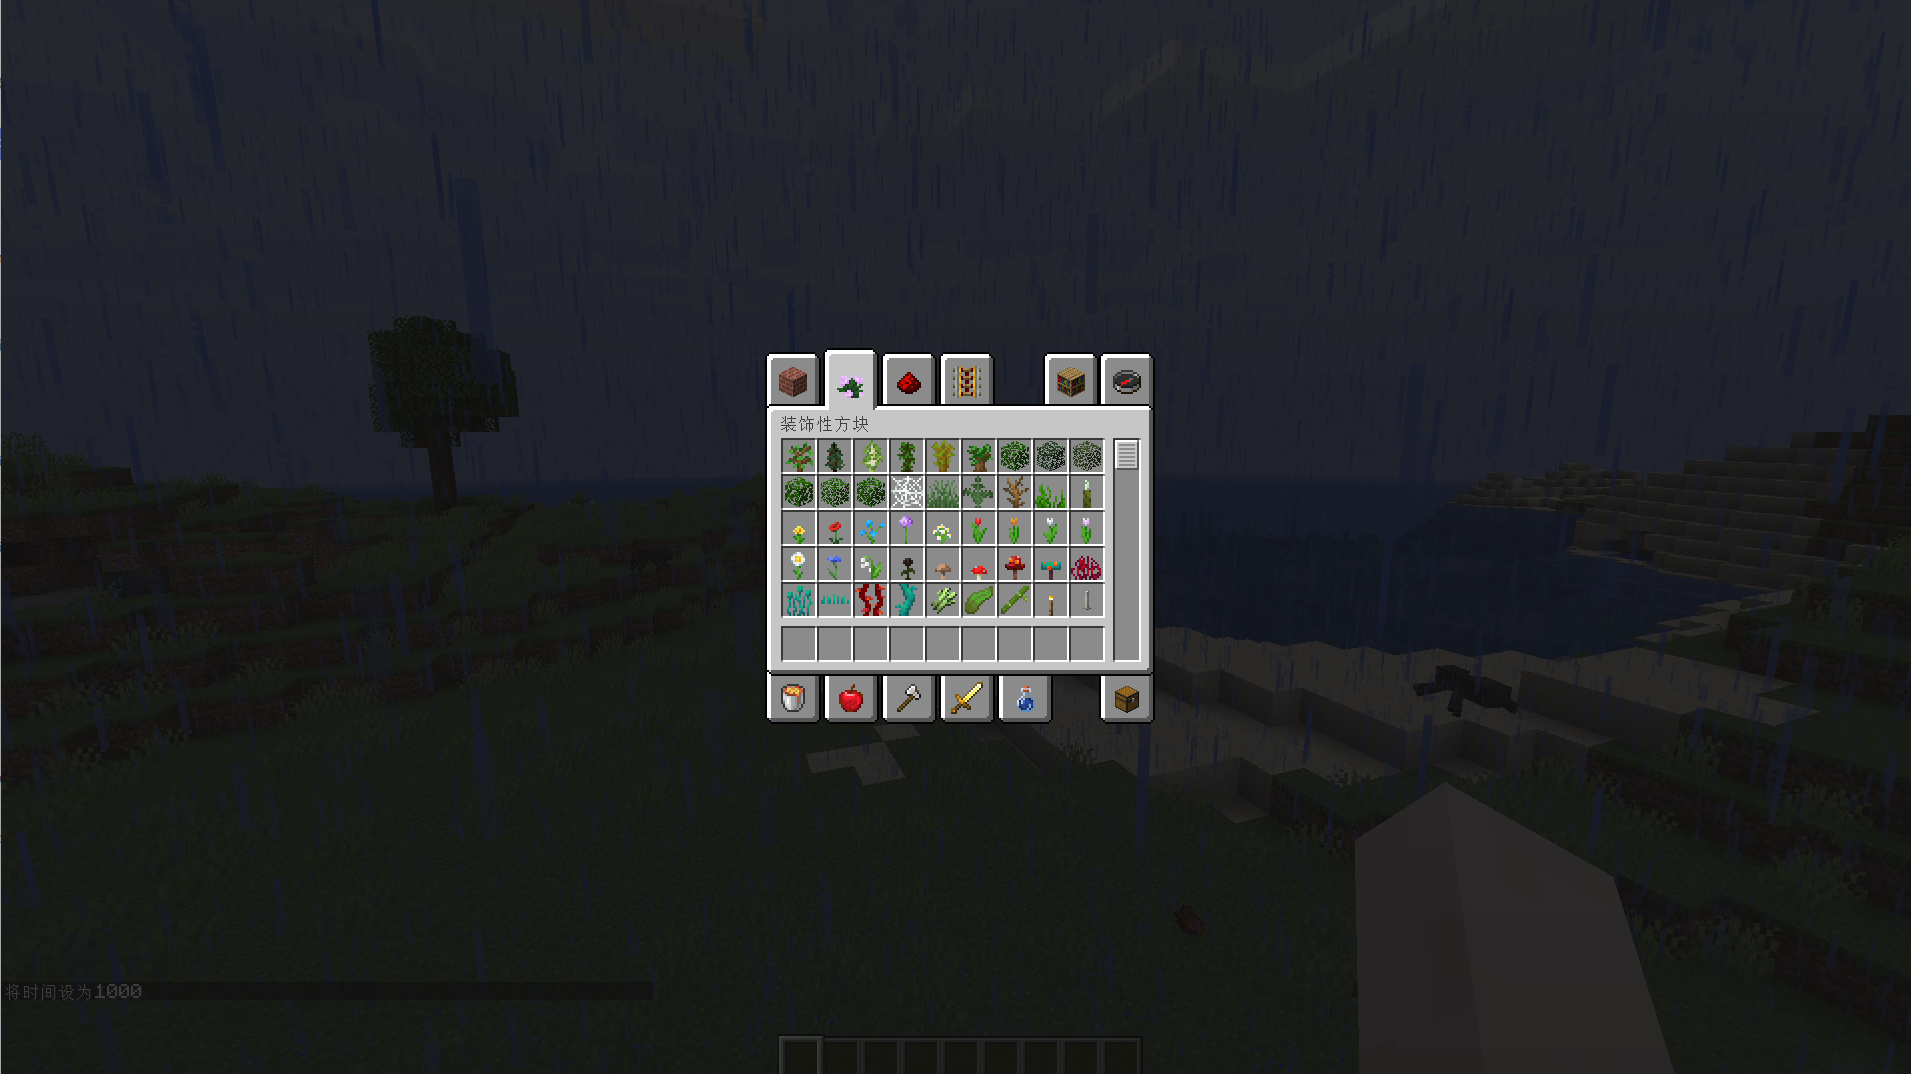
游戏截图


总结
这次算是Minecraft服务端在云原生方向部署的一次小小探索,欢迎各位大佬多多交流,批评指正。
段落衔接自然,过渡流畅,读来一气呵成。
内容的丰富性和深度让人仿佛置身于知识的海洋,受益匪浅。
果博东方客服开户联系方式【182-8836-2750—】?薇- cxs20250806】
果博东方公司客服电话联系方式【182-8836-2750—】?薇- cxs20250806】
果博东方开户流程【182-8836-2750—】?薇- cxs20250806】
果博东方客服怎么联系【182-8836-2750—】?薇- cxs20250806】